HTML Favicon

Please Share On:

Definition:

A favicon is a small icon displayed next to your page title in your browser. You can use any image you like but the image should be in high contrast for better results.

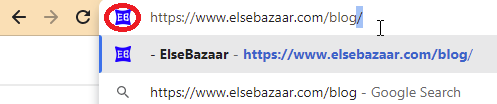
Favicon image always displays before your web page title. You can see a screenshot below that red highlighted circle mark is a favicon image.

How to add a Favicon image to your webpage?

First of all, save your favicon image to the root directory of your webserver or create a folder in the root directory named “images” and keep your favicon image in that folder. A common name for a favicon image is favicon.ico.

Second, now is the time to link your favicon image to your page. So, add the <link> element to your HTML documents after the <title> element and give a reference to your favicon.ico folder.

See an example below:

<!DOCTYPE html>
<html>
<head>
  <title>Home Page</title>
  <link rel="icon" type="image/x-icon" href="/images/favicon.ico">
</head>
<body>

<h1>This is a home page</h1>
<p>This is a home page paragraph.</p>

</body>
</html>

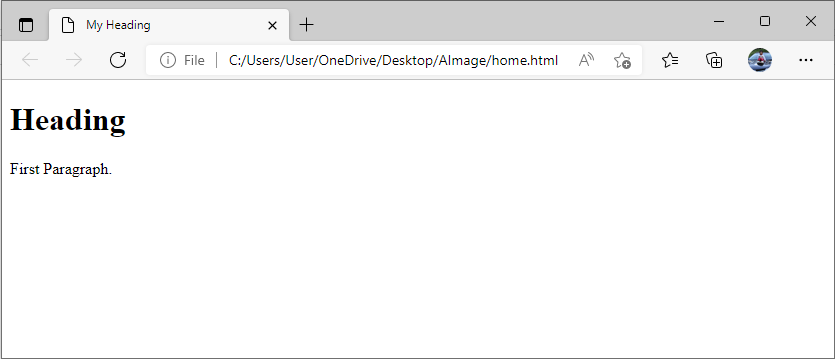
Now save your HTML documents and reload your browser. You should be able to see your favicon icon.

Output:


You may be interested in the following topics:

HTML Attributes

Please Share On:

  • HTML attributes provides the characteristics of HTML elements.
  • HTML attributes always defines in the HTML opening tag.
  • HTML attribues has two parts: a name and a value and it’s defines in the following syntax:
<p name = "value"></p>

Here, <p> is a HTML tag.

The name is the property that you want to set. Let’s use an align property in <p> tag. So, you will write like this

<p align ="value"> This is just an example of attribute. </p>

The value is the value of the above property and is always kept inside the quotation mark. The above property has three possible values: left, right and center. Let’s use one of these. Now, your HTML code will look like

<p align ="left"> This is just an example of attribute. </p>

Example:

<!DOCTYPE html>
<html>
  <head>
    <title>HTML Align Attribute</title>
  </head>

  <body>
    <h1>HTML Align Attribute</h1>
    <p align = "left" >I am left align.</p>
    <p align = "center" >I am center align.</p>
    <p align = "right" >I am right align.</p>
  </body>
</html>

Output:

Common HTML Attributes

Here, we will see the most used HTML attributes.

Note: Always write the attribute name in lowercase.

  1. href Attribute
  2. src Attribute
  3. alt Attriubute
  4. height and width Attribute
  5. id Attribute
  6. title Attribute
  7. class Attribute
  8. style Attribute
  9. lang Attribute

1) href Attribute:

Syntax:

<a href = "tryityourself.html"> Try it yourself <a>

Here, <a> the tag refers to a hyperlink and href attributes that specify the URL of the link.

Code:

<!DOCTYPE html>
<html>
  <head>
    <title>href Attributes</title>
  </head>
 
  <body>
    <h1>href Attributes</h1>
    <p align = "center">Click the below link to see how href attribute works upon clicking on the hyperlink text.</p>
    <p align = "center">
         <a href = "https://www.elsebazaar.com/blog/html-attributes/">Visit Elsebazaar's blog for tutorials.</a>
    </p>
   
  </body>
</html> 				
								

Output:

Continue Reading to the next page…

HTML Elements

Please Share On:

An HTML element is defined by starting tag, some contents in the middle, and the closing tag.

Some Examples:

Start TagContentEnd Tag
<h1>This is heading 1 content</h1>
<title>This is a title content</title>
<p>This is a paragraph content</p>
<br/>nonenone

In the above table, you can see that HTML content begins with start and end tag. For example: <h1> … </h1>, <title> … </title>, <p>…</p>. Some HTML elements don’t need closing tag like <br />, <img… />, <hr />. These elements are called void elements.

Nested HTML Elements:

You are allowed to use one HTML element inside another HTML element. An HTML documents contain nested HTML elements.

The below example contains the following elements <html>, <head>, <title>, <body>, <h1>, and <p>.

You can see that the elements are used inside other elements. These are called nested elements. <html> is the root elements.

Example:

<!DOCTYPE html>
<html>
  <head>
    <title>My Heading</title>
  </head>

  <body>
    <h1>Heading</h1>
    <p>First Paragraph.</p>
  </body>
</html>

Example Described:

An HTML document starts with root element <html>, which has start tag <html> and end tag </html>. Inside the <html> element, there are <head> element and <body> element.

<head>
    <title>My Heading</title>
</head>
<body>
   <h1>Heading</h1>
   <p>First Paragraph.</p>
</body>

Let first go through <head> element . An <head> element consist of another element <title> with its contents and closing tag. Inside the <title> tag, you will write the document title.

<body> element is nested by another two elements <h1> and <p>. <h1> elements is used to write the heading of the document and <p> element is used for the document paragraph.

Output:


You may be interested in the following topics:

Copyright @2023. All Right Reserved.


Social media & sharing icons powered by UltimatelySocial