How do I change the name under apps that display in google play store?

Please Share On:

You have created your first app and published it successfully. But now you don’t like the name appear under the app? See the below screenshot image from google play store.

Here, I want to change my name “Geeta Regmi” into a different name that sounds more professional. For example: xyz software, ElseBazaar, Fast Software, and so on.

Now let’s start, what are the steps I need to go through to change the name?

Step 1:

Login your google play store console

Step 2:

Click on setting displaying at the left corner as below.

Step 3:

Now change the Developer name;

I changed from “Geeta Regmi” to “ElseBazaar”.

Your developer’s name won’t change straight away. Google needs to approve your developer’s name. So, after saved the new developer name, you will see the following message.

That’s it. You just need to wait a few days to get approved of your new developer name.


Step by step to insert both banner and interstitial ads in android apps.

Please Share On:

If you are struggling to insert both banner and interstitial ads in android apps then follow my procedure. This is how I inserted both ads in my android application. The process is very simple and easy.

Step 1:

First of all, you need a google ads dependencies to run google ads in your android apps. So, let’s add google ads dependencies first.

 implementation 'com.google.android.gms:play-services-ads:18.3.0'

Add the above line in your project build.gradle(Module: app) inside dependencies. After this sync your project. You will get the sync now button on the top right corner. Click and wait until the sync finished.

Step 2:

Now go activity.xml file and paste the following code in your layout.

<com.google.android.gms.ads.AdView
        android:id="@+id/adView"
        android:layout_width="match_parent"
        android:layout_height="wrap_content"
        ads:adSize="BANNER"
        ads:adUnitId="@string/banner_ad_unit_id"
        android:layout_alignParentBottom="true">
    </com.google.android.gms.ads.AdView>

within the same file add the following line in the header

xmlns:ads="http://schemas.android.com/apk/res-auto"

The activity will looks like the following

<?xml version="1.0" encoding="utf-8"?>
<RelativeLayout xmlns:android="http://schemas.android.com/apk/res/android"
    xmlns:ads="http://schemas.android.com/apk/res-auto"
    android:orientation="vertical"
    android:layout_width="match_parent"
    android:layout_height="match_parent"
    android:background="@drawable/background">

    <Button
        android:layout_width="650dp"
        android:layout_height="80dp"
        android:text="@string/test"
        android:id="@+id/btnpt1"
        android:layout_marginTop="@dimen/vertical_gap"
        android:background="@drawable/button_selector"
        android:textSize="@dimen/text"
        android:textColor="@color/white"
        android:onClick="practicetest1"
        android:layout_alignParentTop="true"
        android:layout_centerHorizontal="true" />

    <com.google.android.gms.ads.AdView
        android:id="@+id/adView"
        android:layout_width="match_parent"
        android:layout_height="wrap_content"
        ads:adSize="BANNER"
        ads:adUnitId="@string/banner_ad_unit_id"
        android:layout_alignParentBottom="true">
    </com.google.android.gms.ads.AdView>
</RelativeLayout>

Step 3:

Check you manifest.xml has the following internet access permission or not. If you have not added before, its a time to add now.

<uses-permission android:name="android.permission.INTERNET" />

And Add your AdMob Application ID, it can be found in your Admob Application.

<manifest>
    <application>
        <meta-data
            android:name="com.google.android.gms.ads.APPLICATION_ID"
            android:value="ca-app-pub-xxxxxxxxxxxxxxxx~yyyyyyyyyy"/>
    </application>
</manifest>

Step 4:

Now, Open the MainActivity.java file declare the following two lines.

public class MainActivity extends AppCompatActivity {
private InterstitialAd interstitial;
}

In the same MainActivity.java file, add the following code inside onCreate() method.

AdView mAdView = (AdView) findViewById(R.id.adView);
AdRequest adRequest = new AdRequest.Builder().build();
mAdView.loadAd(adRequest);

// Interstitial Ad
interstitial = new InterstitialAd(MainActivity.this);
interstitial.setAdUnitId(getString(R.string.admob_interstitial_id));

interstitial.loadAd(adRequest);
interstitial.setAdListener(new AdListener() {
    public void onAdLoaded() {
        displayInterstitial();
    }
});

Add the below function calling code before the last MainActivity.java closing curl.

public void displayInterstitial() {
if (interstitial.isLoaded()) {
interstitial.show();
}
}

Step 5:

Now, the last step is to define ad unit id in string.xml file

Add the below two code inside string.xml file.

<string name="banner_ad_unit_id">ca-app-pub-3940256099942544/6300978111</string>
    <string name="admob_interstitial_id">ca-app-pub-3940256099942544/1033173712</string>

These are the Test Ads Unit Id. Before release, your app, make sure you change unit_id into your own.

That’s it.


Cannot find Symbol: ApplicationTestCase

Please Share On:

After I upgrade from Android 2.3 to Android X. I am facing “Cannot find Symbol: ApplicationTestCase”. As I am new in Android Studio, I had no idea how to fix this problem. If I faced any problem I always go to www.google.com and search for the solution.

Today, also I did the same and searched why I get “Cannot find Symbol: ApplicationTestCase”. I found a suggestion in www.stackoverflow.com. Delete two sub-folders of the .idea folder

  • ./idea/caches
  • ./idea/libraries

It will solve the problem. Yes, more than 20 users voted for solved problem but when I tried the same process, it didn’t. I have to apply another procedures.

Then, I decided, Why not I create another empty project. I have recently upgrade my AndroidX. It will definitely open my ApplicationText.java class and compare to the old version.

I create a new project named My Application.

Now, Go back and see old version, ApplicationTest.java

Now see new “Test.java” class

Here, I find out that “ApplicationTest.Java” class has been replace by “ExampleInstrumentTest.java”.

Firstly, I need to rename the name of old java class i.e ApplicationTest.Java into ExampleInstumentTest.Java.

Here is the process how to rename java class.

Right Click ApplicationTest.Java -> Refactor -> Rename -> ExampleInstumentTest

And Save.

See the below the renamed java class how it looks like after renamed.

Now, the time is to copy the code from newly created project to the old project.

Lastly, Don’t forget to change the package name into your project package name. Change “MyApplication” to “Your Package Name

Before

public class ExampleInstrumentedTest {
    @Test
    public void useAppContext() {
        // Context of the app under test.
        Context appContext = InstrumentationRegistry.getInstrumentation().getTargetContext();

        assertEquals("com.geetaregmi.MyApplication", appContext.getPackageName());
    }
}

After

public class ExampleInstrumentedTest {
    @Test
    public void useAppContext() {
        // Context of the app under test.
        Context appContext = InstrumentationRegistry.getInstrumentation().getTargetContext();

        assertEquals("com.geetaregmi.citizenshipTest", appContext.getPackageName());
    }
}

Now, add some dependency in your build.gradle(Module:app)

// Required for instrumented tests
androidTestImplementation 'androidx.test.ext:junit:1.1.1'
androidTestImplementation 'androidx.test.espresso:espresso-core:3.2.0'
androidTestImplementation 'com.android.support.test:rules:1.0.2'
androidTestImplementation 'com.android.support.test:runner:1.0.2'

That’s it. It solved my problem. You can also try, if you are facing same problem like mine.


How to upgrade Android Studio 2.2.3 to new versions or Android Studio 3.5.3?

Please Share On:
  1. Open Android Studio 2.2.3, Click Help -> Check For Updates.

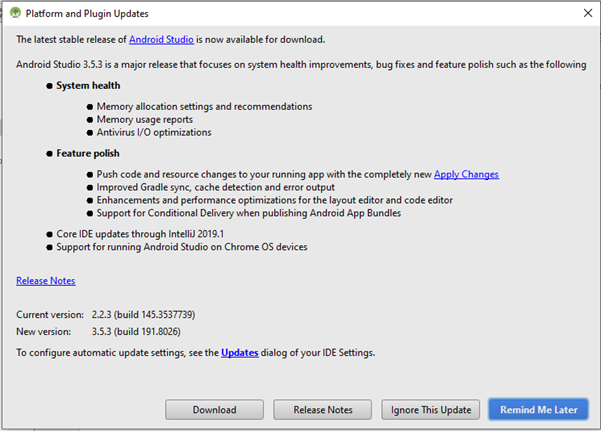
2.If new version of Android Studio is available, the following outcome will display:


Here, new version of Android Studio is available. So, I am going to upgrade to new version. Keep reading my blog to update your android version successfully.

3. Now, We need to download the new version of Android Studio 3.5.3.  Click “Download” button, it will automatically take you to the new version of Android Studio. Now, you need to download a new version.

4. Check you download folder. A new version of Android Studio with extension .exe should be there. Double click to upgrade

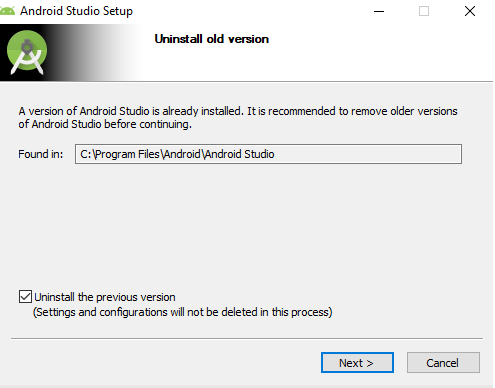
5. A message will appear, and asked you to uninstall the old version. Click Next.

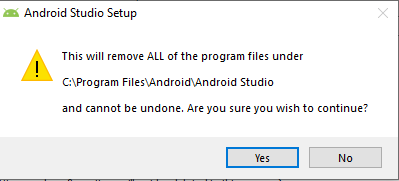
When you click “Next”. Another message appear

Don’t worry. You can click “Yes”. This won’t delete your project. Only the program files will updates and your projects remain unchanged.

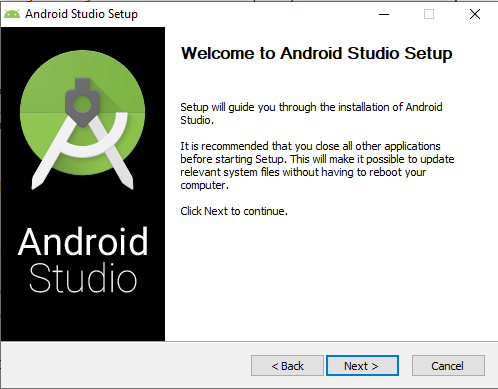
6. Click Next Again.

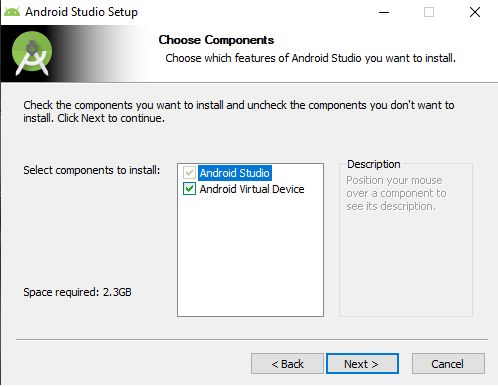
7. Check or uncheck “Android Virtual Device”. It’s up to you. I leave it as is it. Because, I need “Android Virtual Device” and click Next.

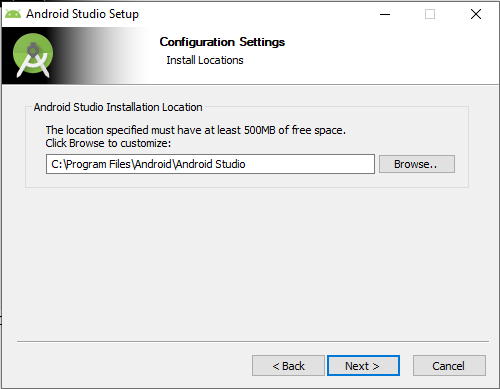
8. Configuration Setting. Click Next.

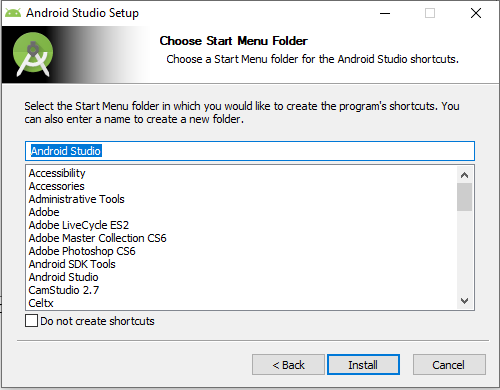
Choose Start Menu Folder and Click Install.

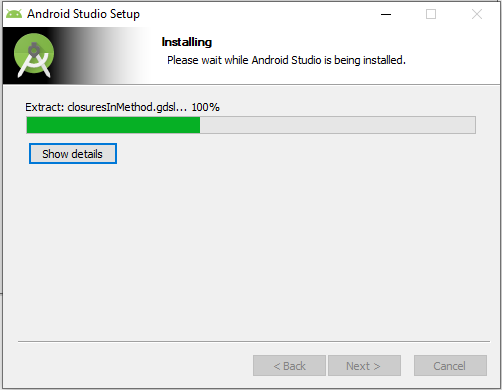
10. Wait until Android Studio Setup is being installed.

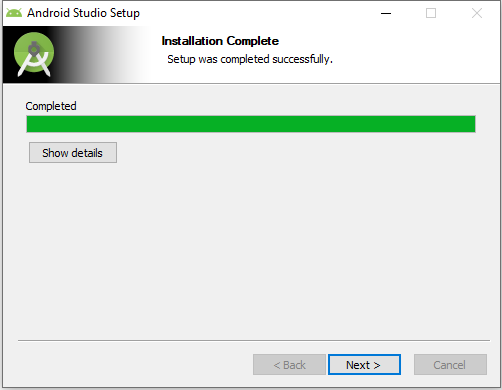
11. Installation Complete. Click Next.

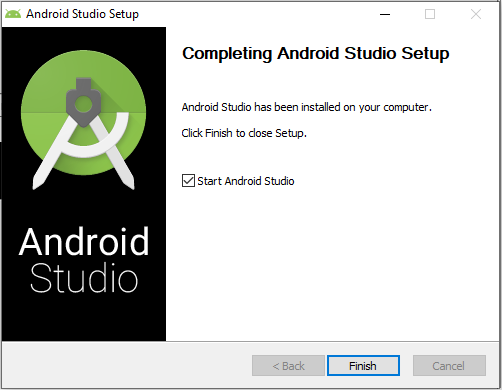
12. Android Studio had been installed in your Computer. Now click Finish to close Setup.

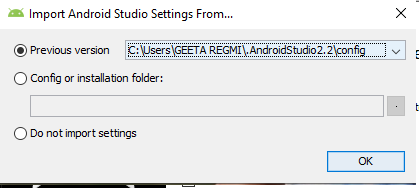
13. Import Android Studio Setting From Previous Version

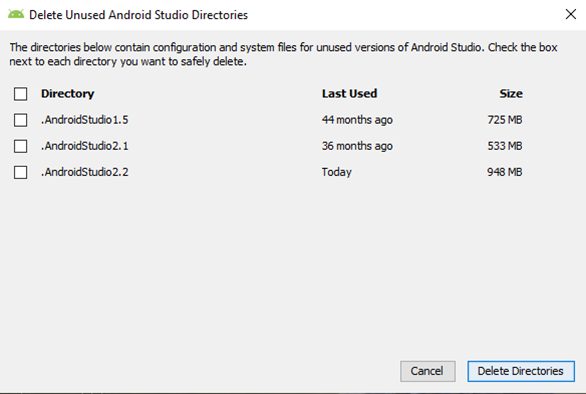
14. Delete Unused Android Studio Directories

Here, I delete .AndroidStudio 1.5 and .AndroidStudio2.1. It depends on your Android Studio Previous settings.

15. After this, new version of Android Studio is automatically open with your current project.

That’s it. Congratulation! You have successfully update you Android Studio from old version to new version. Now, explore the new version of Android Studio 3.5.3

Copyright @2023. All Right Reserved.


Social media & sharing icons powered by UltimatelySocial