You are developing an android app in android studio and suddenly you received the following error “INSTALL_PARSE_FAILED_NO_CERTIFICATES” error while trying to run your app.
It could be several reasons you are getting this error, but one obvious error might be your signature verification.
In your latest Android Studio, you need to select both V1 and V2 to generate a signed apk. The V1 signs just the JAR but V2 signs the entire apk.
Now, follow the following steps to genetare signed apk using V1 and V2 schemes:
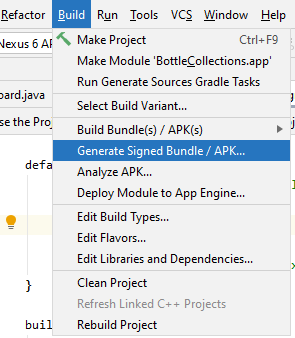
Select Build -> Generate Signed Bundle/APK.
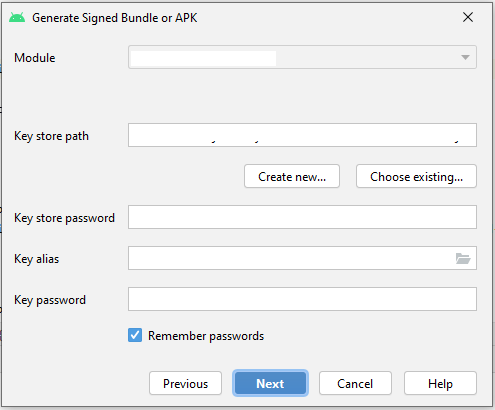
Select Android APK Bundle or APK and click next.
A new pop up window will opens where you store your signed key and fill all required fields that shown in the below image.
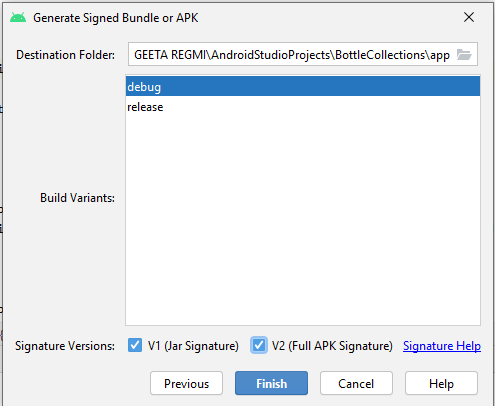
In the next step, select both V1 and V2 and click finish. You choose the build version according to your project, either debug or release.
That’s it. Now run your project. I hope the above process has solved your error.
If you are a new developer and want to know how to install android studio in windows 10, then you are reading the right article. Here, I will show you the all steps.
Step 1: Download Android Studio
First of all, you need to download Android Studio from android developer site. Click Here, to go to the android developer site and download Android Studio.
Step 2 : Installation
After downloading, you can begin your installation process. Double click the download file.
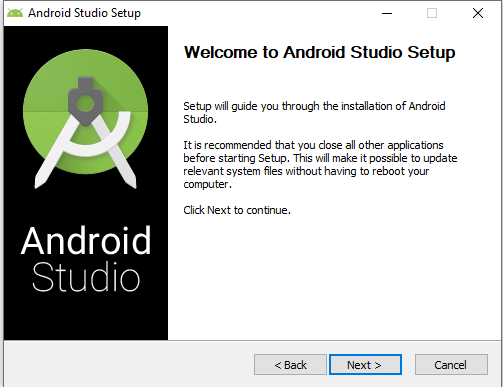
A new “Welcome to Android Studio Setup” open. Click Next.
Choose Components:
Click Next again.
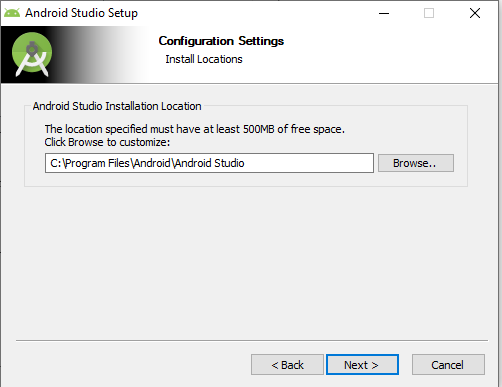
Select Install Location:
Select your Android Studio installation location and click next.
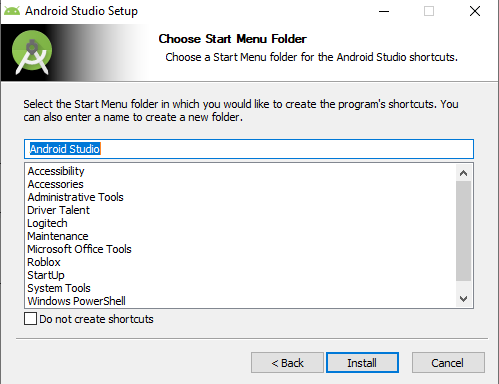
Choose Start Menu Folder:
Choose your start menu folder in which you like to create a program’s shortcuts and click Install.
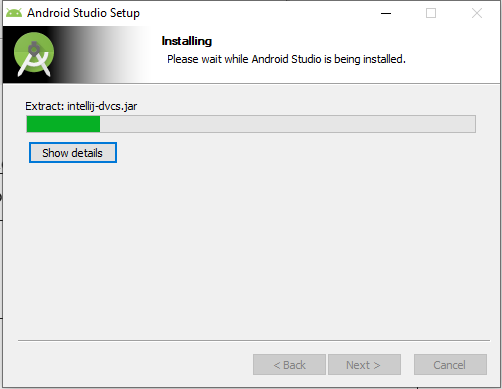
Installing Android Studio:
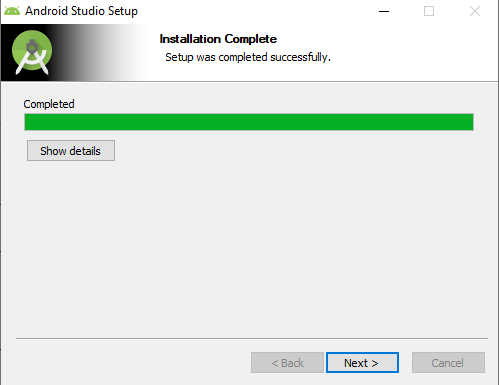
Installation Complete:
After installation complete, click Next.
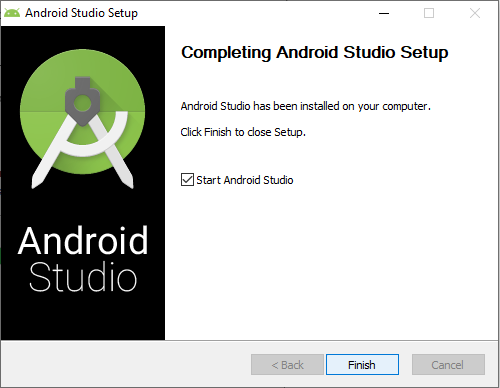
Installation Finished:
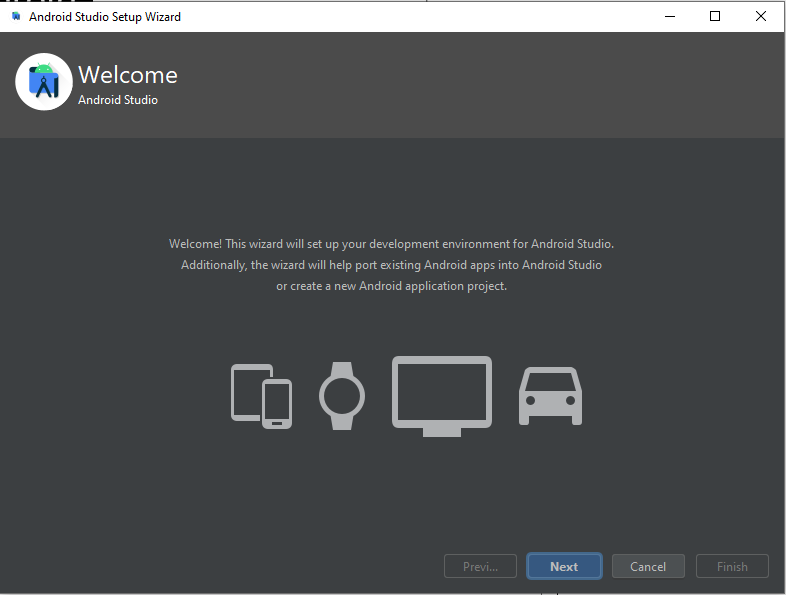
Android Studio Setup Wizard:
Now android studio setup wizard in open in new dialog box. Click Next on it.
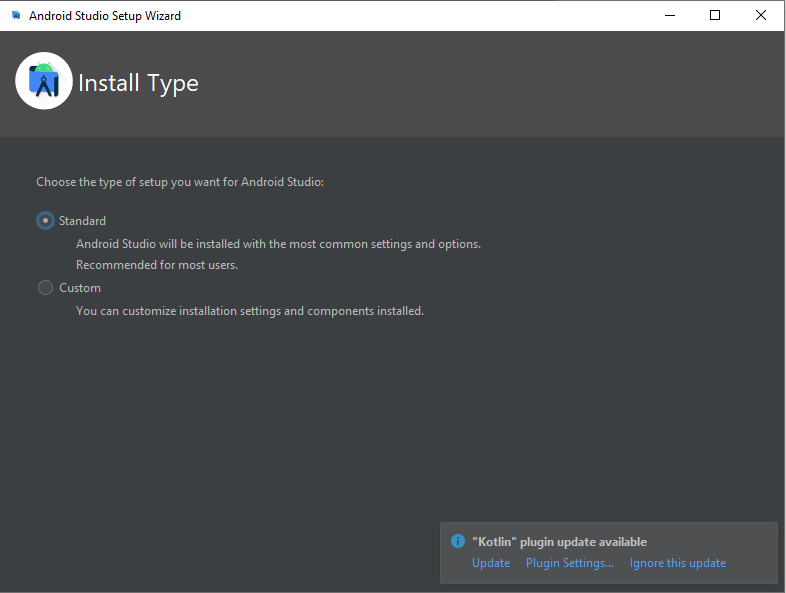
Install Type:
Select your install type Standard or Custom. Here, I choose Standard mode and click Next.
After finished installation, restart your system. That’s it. The Android Studio installation process is done.
You are reading my article, which means you are an android developer and want to create your own custom AlertDialog box.
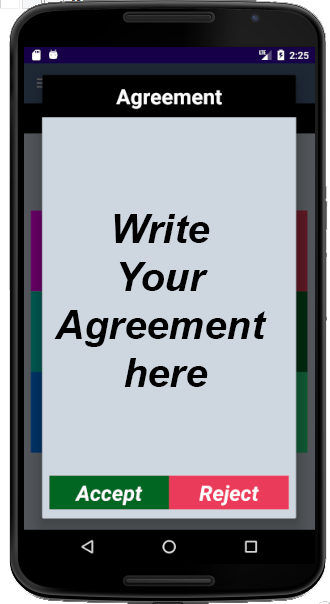
You might be thinking that this is difficult coding. Don’t worry. I am here to help you. You just follow my procedure, you will end up designing a very beautiful custom AlertDialog box as below.
Step 1:
First, you need to design an XML file. Let design an XML file agreement_dialog.xml. It has
Textview (for title) – Agreement
Textview inside Scrollview. If your message is longer than your device height, you can scroll down to see all texts.
In the above agreement_dialog.xml file, you may have noticed that the text and colors are not written directly. They are defined under strings.xml and colors.xml files and provide the reference.
Now, let work on your strings.xml
</resources>
    <string name="dialog_title">Agreement</string>
    <string name="agreement">Write Your Agreement Here </string>
    <string name="accept">Accept</string>
    <string name="reject">Reject</string>
</resources>
You have created your first app and published it successfully. But now you don’t like the name appear under the app? See the below screenshot image from google play store.
Here, I want to change my name “Geeta Regmi” into a different name that sounds more professional. For example: xyz software, ElseBazaar, Fast Software, and so on.
Now let’s start, what are the steps I need to go through to change the name?
Step 1:
Login your google play store console
Step 2:
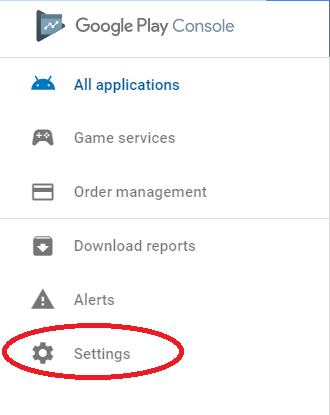
Click on setting displaying at the left corner as below.
Step 3:
Now change the Developer name;
I changed from “Geeta Regmi” to “ElseBazaar”.
Your developer’s name won’t change straight away. Google needs to approve your developer’s name. So, after saved the new developer name, you will see the following message.
That’s it. You just need to wait a few days to get approved of your new developer name.
This article explains to you where your project database store in android studio and how can you open your project database for testing purposes. It sounds hard, but when you follow my procedure, you will quickly learn to find out your android studio’s project database and can open it. You can figure out easily, whether your database is created or not, database table, and the columns and data are there or not. You need to find out things before you proceed ahead with your database project.
Let’s go step by step.
Step 1:
Run your android project either in real device or emulator, whichever you feel comfortable and keep working on.
Wait until the android virtual device runs properly.
Step 2:
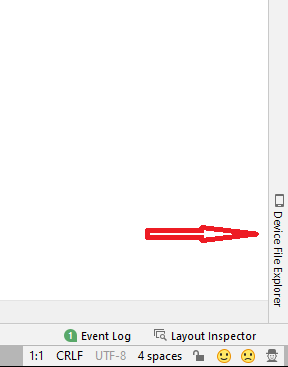
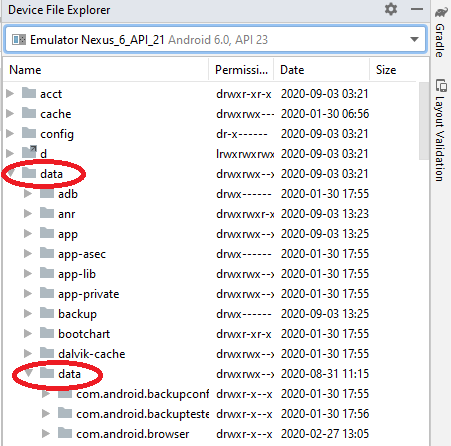
Look at the bottom right corner of your android studio workspace. You will able to see “Device File Explore“.
Step 3:
Click on it and it will expand towards your workspace.
Step 4:
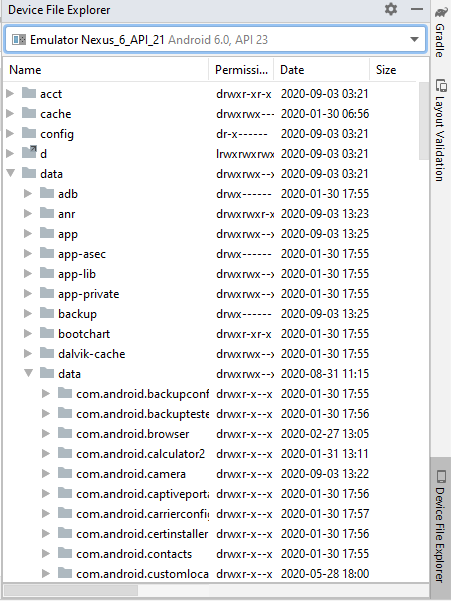
Navigate to data -> data and expand it.
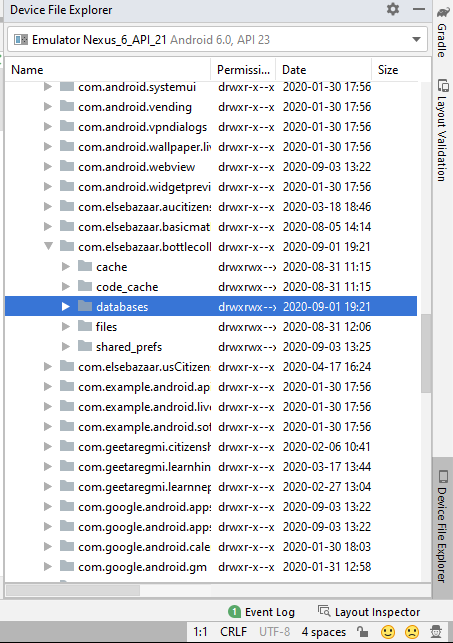
Step 5:
Open your recent android studio project which database you are looking.
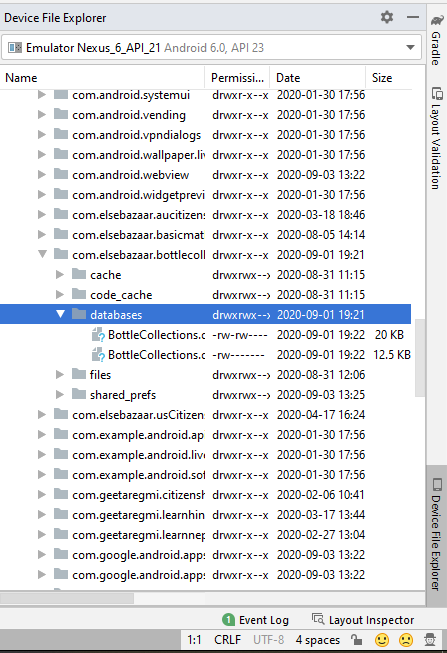
Step 6:
Expand the database folder, you will able to see your database if created successfully while running an android emulator.
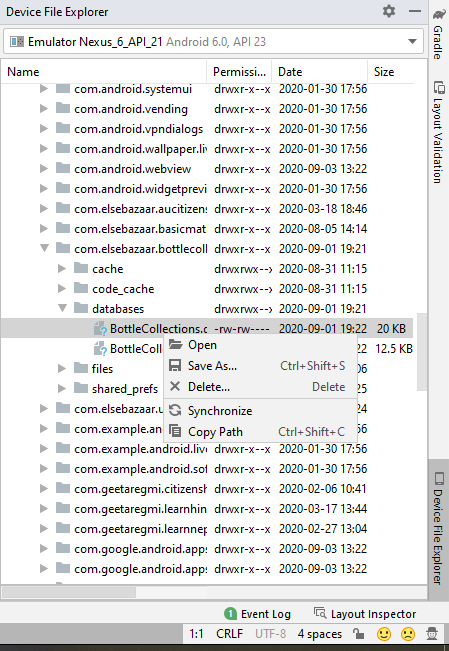
Step 7:
Right-click on your database and save your database file in your required location.
This article will show you how can you implement google places API in your app. Google made an autocomplete places API, which makes it easier to select an address and also gives a suggestion when you start typing.
Let’s begin with how to implement google places API in your app. Here are the shortlists of step I am going to explain:
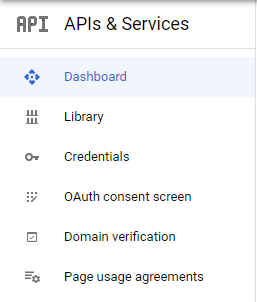
Google Developer Console
Strings.xml
XML File
Java Code
Output
1) Google Developer Console
Here, you have to enable Google Places API and create credentials. Lets begin.
Now, add your new credential for your project by clicking “CREATE CREDENTIALS“. After that click on the edit button to change your API credential name and restriction mode and save your API credential.
You also need to add your package name and SHA-1 fingerprint. You can find package name on the top of your each java file.
package com.elsebazaar.googleplaces;
SHA-1 fingerprint can be found in your project. Go to Gradle ->Your Project Name ->Tasks ->Android ->signingReport. Check your project log, your project SHA-1 fingerprint is there.
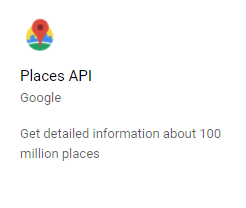
1.3) Enable Google Places API
Go to Library -> Place API and enable your Google Places API.
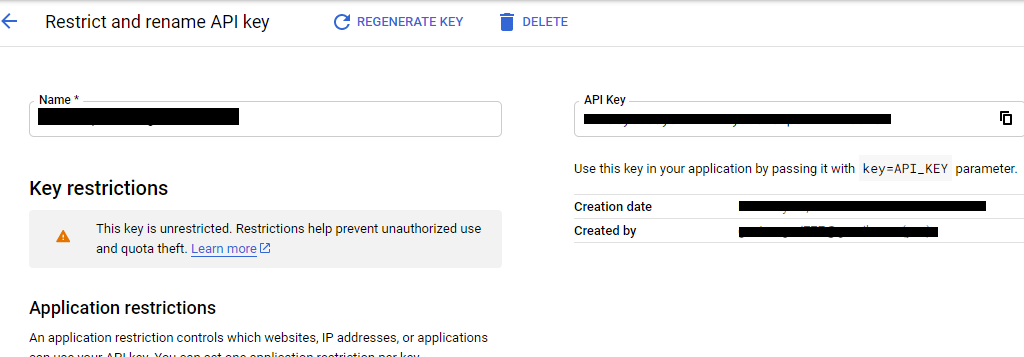
1.4) Copy API Key
You have to use your API key in your project. To get your API key, go back to credential again and select your app credential. You will see an API KEY located on the right-hand side. Copy your API key for now.
2) String.xml
Create a resource of your API key and paste the above API key value in “Your_API_KEY”.
String apiKey = getString(R.string.api_key);
        if (!Places.isInitialized()) {
            Places.initialize(getApplicationContext(), apiKey);
        }
4.4) edittext setOnClickListerner
//maddress on clicklistener
        maddress.setOnClickListener(new View.OnClickListener() {
            @Override
            public void onClick(View v) {
                 // Set the fields to specify which types of place data to
                // return after the user has made a selection.
                List<Place.Field> field = Arrays.asList(Place.Field.ID, Place.Field.ADDRESS);

                // Start the autocomplete intent.
                Intent intent = new Autocomplete.IntentBuilder(AutocompleteActivityMode.FULLSCREEN, field)
                        .build(Address.this);
                //start activity result
                startActivityForResult(intent, AUTOCOMPLETE_REQUEST_CODE);

            }
        });
4.5) Result Activity
@Override
    protected void onActivityResult(int requestCode, int resultCode, Intent data) {
        super.onActivityResult(requestCode, resultCode, data);
        if (requestCode == AUTOCOMPLETE_REQUEST_CODE) {
            if (resultCode == RESULT_OK) {
                //When success initialize place
                Place place = Autocomplete.getPlaceFromIntent(data);

                //set address on edittext
                maddress.setText(place.getAddress());
            } else if (resultCode == AutocompleteActivity.RESULT_ERROR) {
                // TODO: Handle the error.
                Status status = Autocomplete.getStatusFromIntent(data);
                //Log.i(TAG, status.getStatusMessage());
            } else if (resultCode == RESULT_CANCELED) {
                // The user canceled the operation.
            }
        }
    }
In this tutorial, I am going to show you how to add user registration data into the firebase database. Make sure you follow all my process and leave a comment below, if I did not explain in details.
Step 1:Connect Firebase
First of all, you need to connect your Android project to the firebase and add the required dependencies. If you don’t know how can you connect your project to a firebase, read this tutorial first which shows a firebase connection process.
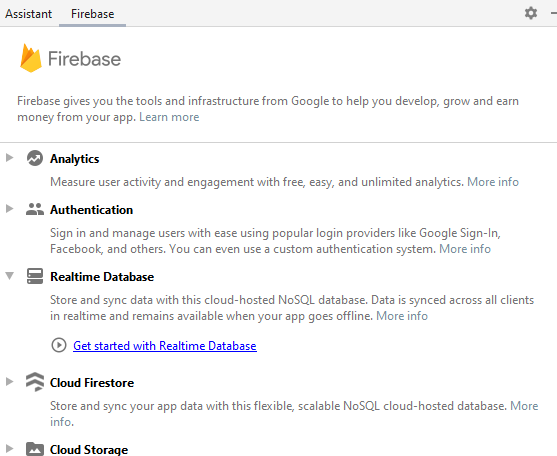
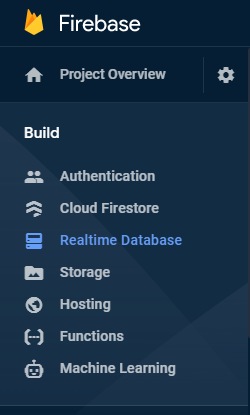
Click on the Tools -> Firebase to connect Firebase database like Firebase Authentication.
It will open the Firebase tab like the below image. Click on Realtime Database -> Get Started with RealtimeDatabase -> Add Database. Follow the process to complete.
Now, you can open your Firebase console. Click on Realtime Database.
You will see an empty database with the root node and null value.
Click on rules, you need to change the Firebase database rules and allow only authenticated users to read and write data. So, replace the old Firebase rules with these new rules.
{
  "rules": {
    "users": {
      "$userId": {
        // grants write access to the owner of this user account
        // whose uid must exactly match the key ($userId)
        ".read": "auth != null && $userId === auth.uid",
        ".write": "auth != null && $userId === auth.uid",

      }
    }
  }
}
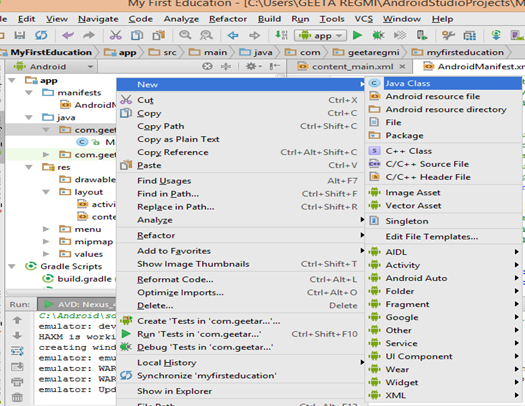
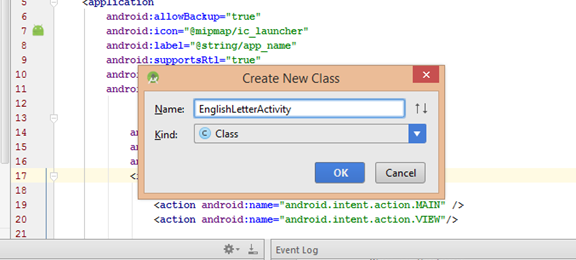
Step 3: Create User.java class
Now, lets go to the coding part. You have already created an authenticated registration form from step 1 tutorial. Now, this time we are going to add that data to the Firebase Database.
First, create a separate User.java class and generate getter and setter of the data, and create constructors. See a code below User.java.
package com.elsebazaar.bottlecollections;

public class User {
    public String name;
    public String email;


    public String password;

    public User(){
    }

    public User(String name, String email, String password){
        this.name = name;
        this.email = email;
        this.password = password;
    }

    public String getName() {
        return name;
    }

    public void setName(String name) {
        this.name = name;
    }

    public String getEmail() {
        return email;
    }

    public void setEmail(String email) {
        this.email = email;
    }

    public String getPassword() {
        return password;
    }

    public void setPassword(String password) {
        this.password = password;
    }


}
Step 4: Add code to Register.java
This below code is used to add data to the Firebase
Here is a complete code using during registration. The data should only add to the Firebase database after authentication success and user clicked the register button. So, the above code is added inside the register button onClicked method.
package com.elsebazaar.bottlecollections;

import android.content.Intent;
import android.graphics.Color;
import android.os.Bundle;
import android.text.TextUtils;
import android.view.View;
import android.widget.Button;
import android.widget.EditText;
import android.widget.ProgressBar;
import android.widget.TextView;

import androidx.annotation.NonNull;

import com.google.android.gms.tasks.OnCompleteListener;
import com.google.android.gms.tasks.Task;
import com.google.android.material.snackbar.Snackbar;
import com.google.firebase.auth.AuthResult;
import com.google.firebase.auth.FirebaseAuth;
import com.google.firebase.auth.FirebaseUser;
import com.google.firebase.database.DatabaseReference;
import com.google.firebase.database.FirebaseDatabase;

public class Register extends MainActivity {

    private FirebaseDatabase firebaseDatabase;
    private DatabaseReference databaseReference;
    private FirebaseAuth mAuth;
    private User user;

    ProgressBar progressBar;
    EditText mName, mEmail, mPassword, mConfirmPassword;

    Button btnregister;
    TextView txtalreadyamember;
    Snackbar snackbar;
    String emailPattern = "[a-zA-Z0-9._-]+@[a-z]+\\.+[a-z]+";

    @Override
    protected void onCreate(Bundle savedInstanceState) {
        super.onCreate(savedInstanceState);
        setContentView(R.layout.register);

        progressBar = findViewById(R.id.progressBar);

        mName = findViewById(R.id.ettxtName);
        mEmail = findViewById(R.id.ettxtEmail);
        mPassword = findViewById(R.id.ettxtPassword);
        mConfirmPassword = findViewById(R.id.ettxtConfirmPassword);
        btnregister = findViewById(R.id.btnRegister);
        txtalreadyamember = findViewById(R.id.txtAlreadyAMember);

        mAuth = FirebaseAuth.getInstance();

        //initListeners();
        btnregister.setOnClickListener(new View.OnClickListener() {
            @Override
            public void onClick(View v) {
                String name = mName.getText().toString().trim();
                String email = mEmail.getText().toString().trim();
                String password = mPassword.getText().toString().trim();
                String confirmpassword = mConfirmPassword.getText().toString().trim();

                //check whether name is empty or not
                if(TextUtils.isEmpty(name)){
                    mName.setError("Name is required");
                    return;
                }

                //check whether email address is empty or not
                if(TextUtils.isEmpty(email)){
                    mEmail.setError("Email Address is required");
                    return;
                }

                //check email address pattern is correct or not
                //if (isEmailValid(email))

                if (!email.matches(emailPattern)){
                    mEmail.setError("Email Address is invalid");
                    return;
                }

                //check whether password is empty or not
                if(TextUtils.isEmpty(password)){
                    mPassword.setError(" Password is required");
                    return;
                }

                //check whether password is less than 6 characters?
                if(password.length() < 6){
                    mPassword.setError("Password must be >= 6 characters");
                    return;
                }

                //check whether password and confirm password are match or not
                if(!password.equals(confirmpassword)){
                    mConfirmPassword.setError("Password does not match");
                    return;
                }

                //Make progress bar visible
                progressBar.setVisibility(View.VISIBLE);

                //User Method call
                user = new User (name, email, password);

                //create user by calling registerUser function
                registerUser(email, password);

                //Call function to empty All EditText
                emptyInputEditText();
            }
        });
    }

    private void registerUser(String email, String password) {
        //Register the user in firebase
        mAuth.createUserWithEmailAndPassword(email,password).addOnCompleteListener(new OnCompleteListener<AuthResult>() {
            @Override
            public void onComplete(@NonNull Task<AuthResult> task) {
                if (task.isSuccessful()){

                    FirebaseUser user = mAuth.getCurrentUser();
                    updateUI(user);

                    //display snackbar with green background
                    View view = findViewById(android.R.id.content);
                    String message = "Account Created Successfully";
                    int duration = Snackbar.LENGTH_LONG;

                    snackbar = Snackbar.make(view, message, duration)
                            .setAction("Action", null);
                    View sbView = snackbar.getView();
                    sbView.setBackgroundColor(Color.GREEN);
                    snackbar.show();

                    //Toast.makeText(Register.this,"Account Created",Toast.LENGTH_SHORT).show();
                    startActivity(new Intent(getApplicationContext(), Home.class));

                }
                else{
                    //display snackbar with red background
                    View view = findViewById(android.R.id.content);
                    String message = "Email ID already exits";
                    int duration = Snackbar.LENGTH_LONG;

                    snackbar = Snackbar.make(view, message, duration)
                            .setAction("Action", null);
                    View sbView = snackbar.getView();
                    sbView.setBackgroundColor(Color.RED);
                    snackbar.show();

                    //Toast.makeText(Register.this,"Error Occured" + task.getException(),Toast.LENGTH_SHORT).show();*/
                   // updateUI(null);
                    progressBar.setVisibility(View.INVISIBLE);
                }
            }
        });
    }


    /**
     * This method is to empty all input edit text
     */
    private void emptyInputEditText() {
        mName.setText(null);
        mEmail.setText(null);
        mPassword.setText(null);
        mConfirmPassword.setText(null);
    }

    public void onStart(){
        super.onStart();
        //check if user is signed in and update UI accordingly
        FirebaseUser currentUser = mAuth.getCurrentUser();
        updateUI(currentUser);
    }


    private void updateUI(FirebaseUser currentUser) {
        if (user != null) {
            firebaseDatabase = FirebaseDatabase.getInstance();
            databaseReference = firebaseDatabase.getReference();//databasereference

            String uid = currentUser.getUid();
            DatabaseReference userRef = databaseReference.child("users");//Create child node reference
            userRef.child(uid).setValue(user);//Insert value to child node
        }
    }

    public void enabled(View view) {
        Intent intent = new Intent(Register.this, MainActivity.class);
        startActivity(intent);
        finish();
    }
}

That's it. Run your program and see the result.
We use AVD to test our Android Application before launch into google play store and see how it looks like on different devices. AVD Manager is a tool that use to create and manage AVD for the Android Emulator. It helps us to test our application without real devices.
Here are the steps to create a new AVD.
Step 1: Launch Android Studio
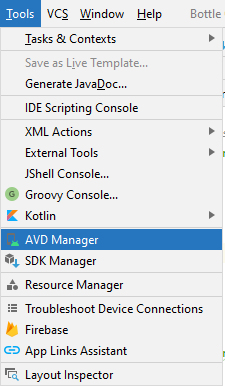
Step 2: Select Tools-> AVD Manager.
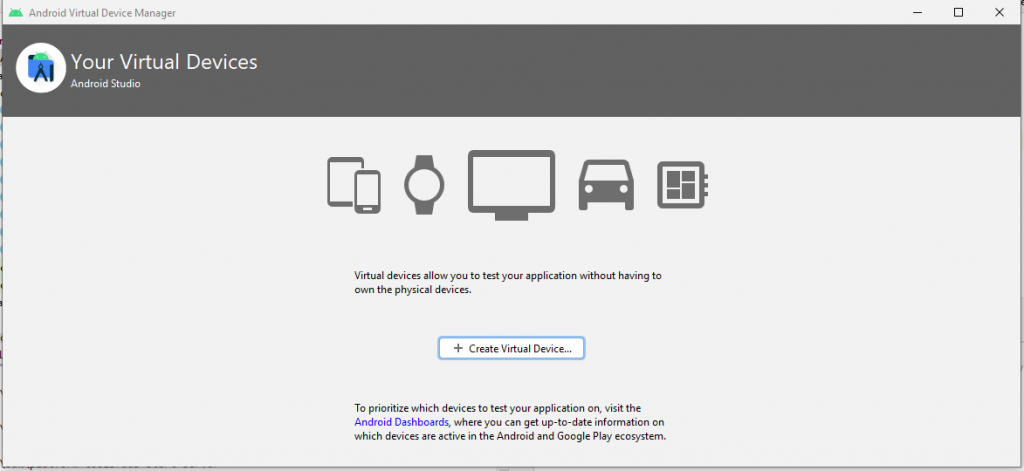
It will open the below option to create a new virtual devices
Step 3: Click on “+ Create Virtual Device..”.
Step 4: Select Hardware
Now, the next step is to select the hardware device. You can select each category and your favorite device’s resolution. See the below diagram. I have chosen a phone in a category and Nexus 6. After you select your emulator, click on the Next.
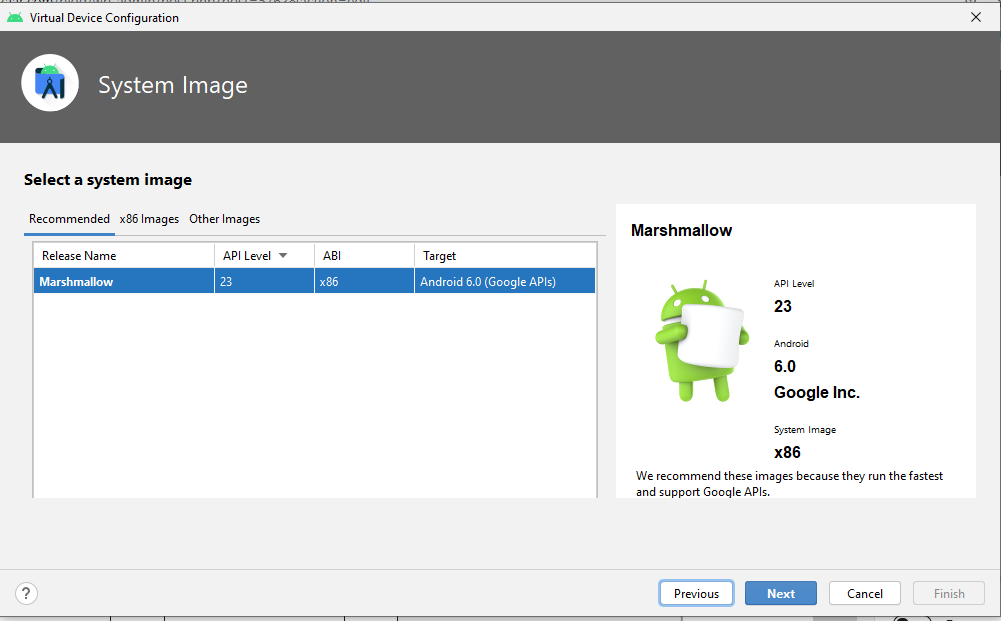
Step 5: Select SDK Version
After you select AVD device, now your next step is to select SDK Version. If you have various SDK versions like kitkat, Lollipop and Marshmallow etc., select any one. Here, I have only installed Marshmallow SDK version. So, I choose marshmallow SDK version and click Next.
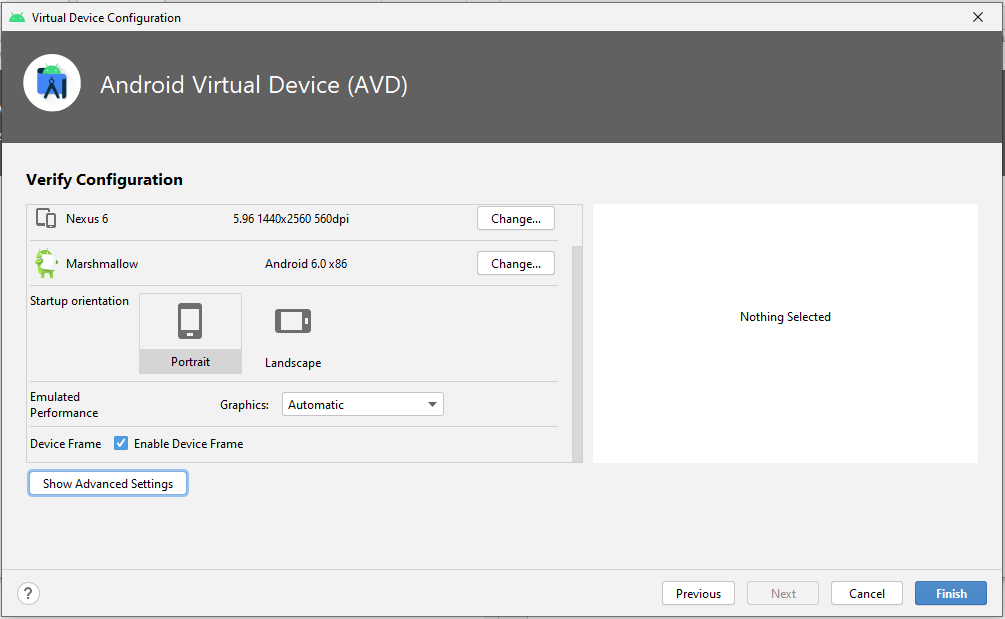
Step 6: Choose AVD Name
Here, you need to choose your AVD name. Write your AVD name in this format “Device Name API Version”. For example: Nexus 6 API 23. It will be easy for you what device are you using and which API level. Click Finish after writing AVD name.
Now, you can see that your Android Studio is creating your AVD emulator.
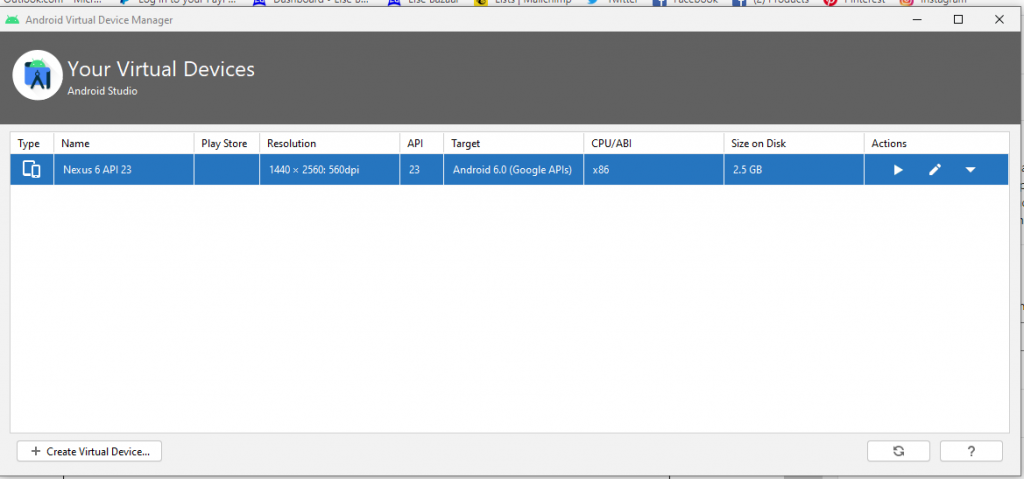
Step 7 : Android Virtual Device Created
Now, you can see your newly created AVD emulator is created successfully.
If you want to create more AVD, simply click the “+Create Virtual Device” and follow the step 4 to 6 again.
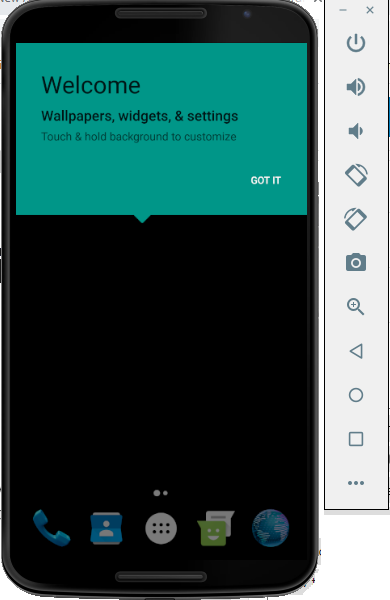
Run your application and see the output.
That’s it. You have successfully created your AVD emulator.