
You are reading my article, which means you are an android developer and want to create your own custom AlertDialog box.
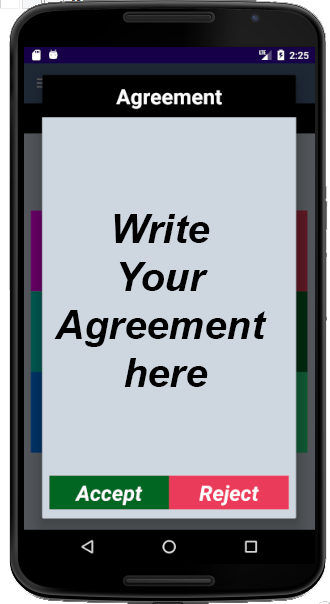
You might be thinking that this is difficult coding. Don’t worry. I am here to help you. You just follow my procedure, you will end up designing a very beautiful custom AlertDialog box as below.
Step 1:
First, you need to design an XML file. Let design an XML file agreement_dialog.xml. It has
- Textview (for title) – Agreement
- Textview inside Scrollview. If your message is longer than your device height, you can scroll down to see all texts.
- 2 buttons: one for “Accept” and one for “Reject”
Now see an XML source code to design.
<?xml version="1.0" encoding="utf-8"?>
<RelativeLayout xmlns:android="http://schemas.android.com/apk/res/android"
    android:layout_width="match_parent"
    android:layout_height="match_parent"
    android:background="@color/background">

    <TextView
        android:id="@+id/dialog_title"
        android:layout_width="match_parent"
        android:layout_height="wrap_content"
        android:padding="10dp"
        android:gravity="center_horizontal"
        android:textSize="30sp"
        android:textStyle="bold"
        android:textColor="@color/white"
        android:background="@color/black"
        android:text="@string/dialog_title"/>

    <ScrollView
        android:layout_width="match_parent"
        android:layout_height="match_parent"
        android:layout_below="@+id/dialog_title">

        <RelativeLayout
            android:layout_width="match_parent"
            android:layout_height="wrap_content"
            android:id="@+id/relativeLayout"
            android:background="@color/background"
            android:padding="10dp">

            <LinearLayout
                android:layout_width="match_parent"
                android:layout_height="wrap_content"
                android:id="@+id/agreementlayout"
                android:layout_gravity="center"
                android:orientation="vertical">

                <TextView
                    android:id="@+id/agreement1"
                    android:layout_width="wrap_content"
                    android:layout_height="wrap_content"
                    android:text="@string/agreement"
                    android:textColor="@color/black"
                    android:textSize="25sp"/>

            </LinearLayout>


            <LinearLayout
                android:layout_width="match_parent"
                android:layout_height="wrap_content"
                android:id="@+id/buttonlayout"
                android:layout_marginTop="10dp"
                android:layout_gravity="center"
                android:orientation="horizontal"
                android:layout_below="@+id/agreementlayout">

                <Button
                    style="?android:attr/actionButtonStyle"
                    android:id="@+id/button_accept"
                    android:layout_width="0dp"
                    android:layout_height="wrap_content"
                    android:layout_weight="0.50"
                    android:textColor="@color/white"
                    android:textSize="30sp"
                    android:background="@color/green"
                    android:text="@string/accept"
                    android:textStyle="bold|italic"/>

                <Button
                    style="?android:attr/actionButtonStyle"
                    android:id="@+id/button_reject"
                    android:layout_width="0dp"
                    android:layout_height="wrap_content"
                    android:layout_weight="0.50"
                    android:textColor="@color/white"
                    android:textSize="30sp"
                    android:background="@color/watermelonRed"
                    android:text="@string/reject"
                    android:textStyle="bold|italic"/>

            </LinearLayout>
        </RelativeLayout>
    </ScrollView>
</RelativeLayout>
In the above agreement_dialog.xml file, you may have noticed that the text and colors are not written directly. They are defined under strings.xml and colors.xml files and provide the reference.
Now, let work on your strings.xml
</resources>
    <string name="dialog_title">Agreement</string>
    <string name="agreement">Write Your Agreement Here </string>
    <string name="accept">Accept</string>
    <string name="reject">Reject</string>
</resources>
Now colors.xml
<?xml version="1.0" encoding="utf-8"?>
<resources>
    <color name="background">#CED6E0</color>
    <color name="white">#ffffff</color>
    <color name="black">#000000</color>
    <color name="green">#006622</color>
    <color name="watermelonRed">#EB3B5A</color>
</resources>
Step 2:
Create a button on your activity.xml Whenever the button is clicked, an AlertDialogue button should open.
Here is a design for your button XML file.
<?xml version="1.0" encoding="utf-8"?>
<LinearLayout
    xmlns:android="http://schemas.android.com/apk/res/android"
    xmlns:app="http://schemas.android.com/apk/res-auto"
    android:layout_width="match_parent"
    android:layout_height="match_parent"
    android:gravity="center"
    android:id="@+id/alertdialog"
    android:orientation="vertical">

    <Button
        android:layout_width="match_parent"
        android:layout_height="wrap_content"
        android:id="@+id/openalertdialog"
        android:text="@string/open_alertdialog"
     />
</LinearLayout>
Now, add one more string in your strings.xml file.
<string name="open_alertdialog">Show AlertDialog</string>
Step 3:
Open custom AlertDialog on clicked on the activity button.
 openalertdialog.setOnClickListener(new View.OnClickListener() {
            @Override
            public void onClick(View v) {
                //Toast.makeText(Activity.this, "Collect clicked", Toast.LENGTH_SHORT).show();
                final AlertDialog.Builder builder = new AlertDialog.Builder(Activity.this);

                // set the custom layout
                final View customLayout = getLayoutInflater().inflate(R.layout.agreement_dialog, null);
                builder.setView(customLayout);

                //set button accept and reject onclicklistener
                btnaccept = customLayout.findViewById(R.id.button_accept);
                btnreject = customLayout.findViewById(R.id.button_reject);

                btnaccept.setOnClickListener(new View.OnClickListener() {
                    @Override
                    public void onClick(View v) {
                        //If accept, go to accept activity
                        Intent intent_accept = new Intent(Activity.this, Accept.class);
                        startActivity(intent_accept);
                    }
                });

                btnreject.setOnClickListener(new View.OnClickListener() {
                    @Override
                    public void onClick(View v) {
                         //If reject, go to reject activity
                        Intent intent_reject = new Intent(Activity.this, Reject.class);
                        startActivity(intent_reject);
                    }
                });

                AlertDialog alert = builder.create();
                alert.show();
        });
Output:
That’s it. Thank you for reading my article.
You may interest in the following topics:
- How to implement searchView widget in android Studio through Recycleview?
- How to create an expandable listview in Fragments in Android Studio?
- How to create an expandable list view in Android Studio?
- How do I check Intel Virtualization Technology is enabled or not in Windows 10?
- Plugin ‘Android WiFi ADB’ is compatible with IntelliJ IDEA only because it doesn’t define any explicit module dependencies
- Could not install Gradle Distribution from ‘https://services.gradle.org/distributions/gradle-6.5-all.zip’
- How to solve “INSTALL_PARSE_FAILED_NO_CERTIFICATES” error in Android Studio?
- Android Studio Run/Debug configuration error: Module not specified.
- How to search in multiple nodes in Firebase Database?
- How to get the sum of child nodes in Firebase database?
- How to display website in an android app using WebView component?
- Android Layout Using ViewPager and Fragments
- How do I install Android Studio in Windows 10?
- How to display ListView in Fragments using ViewPagers?
- How to create a custom AlertDialog in Android Studio?
- How do I change the name under apps that display in google play store?
- Where does my database store in Android Studio?
- How to add google places autocomplete in Android Edittext?
- How do I convert dp into px in the android studio?
- What are the android screen background sizes?
- What are the sizes of the Android icon located inside the mipmap?
- How do I remember my android app signing key?
- How do I create a Toolbar in Android Studio?
- How to get Android Spinner Dropdown?
- error: package R doesn’t exist in android studio project?
- Firebase Email and Password registration for Android App
- How do I change the company domain name in Android Studio after creating a project?
- How do I make an existing Android Studio Project copy?
- How do I migrate an Android Studio 3.2 existing project to Android X?
- Step by step to insert both banner and interstitial ads in android apps.
- Android TimePicker upon clicking on edittext in Android Studio?
- Migrating to AndroidX Errors:
- How to popup date picker when clicking on edittext in Android Studio?
- AndroidX: ExampleInstrumentedTest.java Class Source code
- How to add user registration data into the Firebase database?
- Cannot find Symbol: ApplicationTestCase
- How do I use Android vector images in Android apps?
- How to create a new Android Virtual Device (AVD) in Android Studio?
- On SDK version 23 and up, your app data will be automatically backed up and restored on app install.
- App is not indexable by Google Search; consider adding atleast one Activity with an Action-View intent-filter.
- How do I style my button in Android app?
- How do I create drawable folder in Android Studio?
- How do I create new classes in Android Studio?
- How to create new android project tutorial?
- How to upgrade Android Studio 2.2.3 to new versions or Android Studio 3.5.3?
- error: Package R does not exist after renamed package name?