Here, I will show you the whole process of how can you display your listview in fragments using view pagers.
Steps to follow:
Here are the steps you need to follow to create a listview in the fragment.
- Add Design Support Dependencies
- Create TabLayout Fragment with ListView: tab1.xml and tab2.xml
- Create Java class for tab1.java and tab2.java
- Create a ViewPagerAdapter in Java class. For example: ViewPagerAdapter.java
- Creating CustomAdapater
- Remove ActionBar
- Design your TabLayout and ViewPager in activity_main.xml
- Add code in MainActivity.java
- Create header_item.xml to display listitem titles
- Create main_toolbar.xml
- Create colors.xml
- Create strings.xml
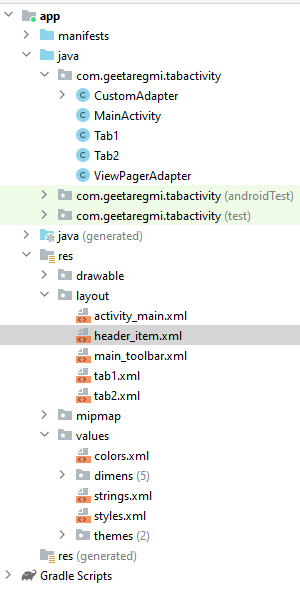
See the below diagrams, we need to create accordingly.
Now, Let’s proceed in detail from step 1 to step 7.
1) Add Design Support Dependencies:
You can add your Android design support dependencies into either way:
1.1) Add directly in your Project Module: build.gradle
Open App -> Gradle Scripts ->build.gradle(Module: Your_Project_Name.app)
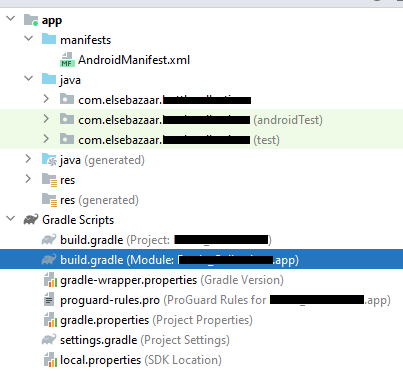
Add the below code inside dependencies
dependencies
{
implementation 'com.google.android.material:material:1.4.0'
}
OR
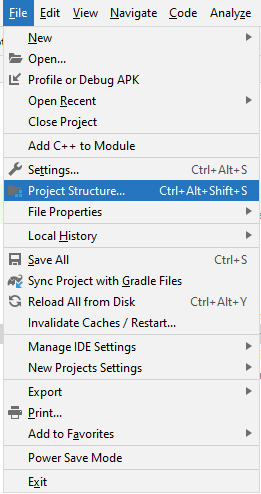
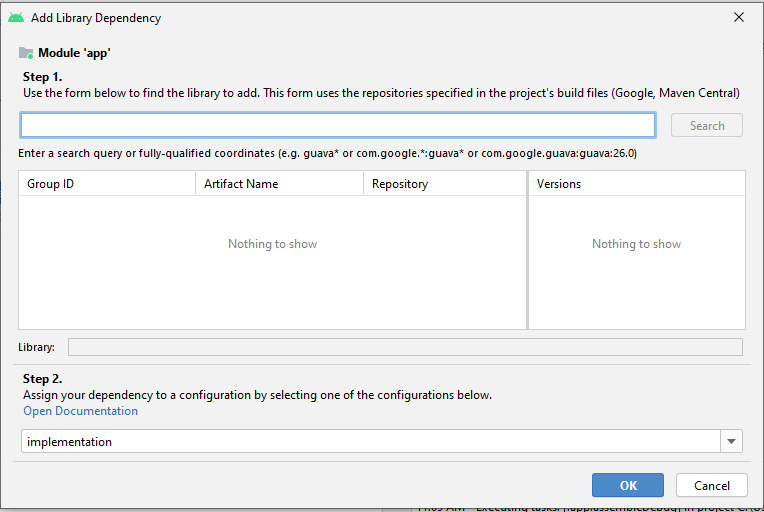
2.1) Select File -> Project Structure
2.2) Select Dependencies and click “+” sign
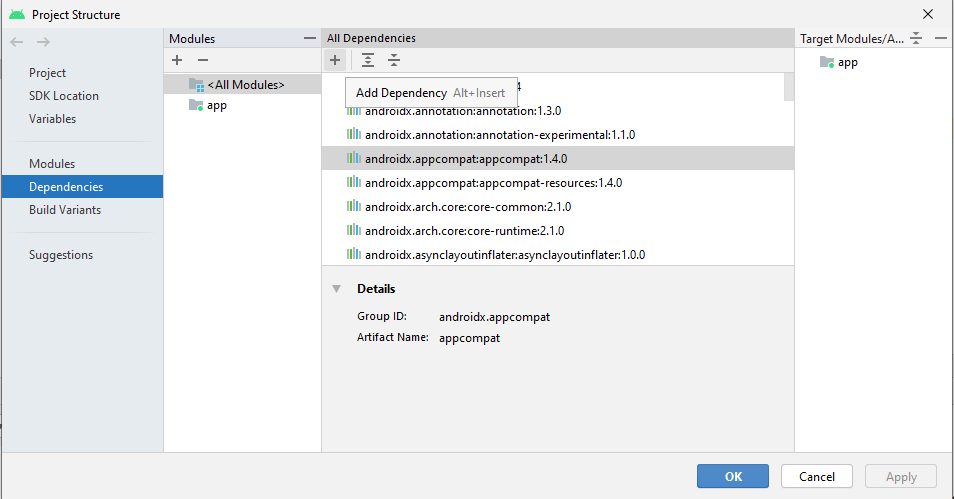
Choose “Library Dependencies” and select your Design Support Dependencies and click OK.
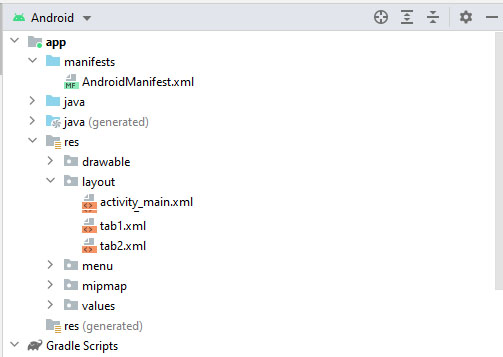
2) Create TabLayout Fragment: tab1.xml and tab2.xml
Now, you have to create tab1.xml and tab2.xml files. In the above screenshot, You can see that I have used only two tabs. If you need more than two tabs, create tab3.xml, tab4.xml accordingly, or your own name XML file.
Here, you will design your XML file accordingly to what exactly you want to display on your fragment page. Here, I have created a ListView to display items in a list.
Tab1.xml
<?xml version="1.0" encoding="utf-8"?>
<RelativeLayout xmlns:android="http://schemas.android.com/apk/res/android"
    xmlns:ads="http://schemas.android.com/apk/res-auto"
    xmlns:tools="http://schemas.android.com/tools"
    android:layout_width="match_parent"
    android:layout_height="match_parent"
    android:background="@color/colorAccent"
    android:padding="10dp">

    <ListView
        android:id="@+id/listView"
        android:layout_width="match_parent"
        android:layout_height="wrap_content"
        android:background="@color/colorAccent"/>

</RelativeLayout>
Tab2.xml
<?xml version="1.0" encoding="utf-8"?>
<RelativeLayout xmlns:android="http://schemas.android.com/apk/res/android"
    xmlns:ads="http://schemas.android.com/apk/res-auto"
    xmlns:tools="http://schemas.android.com/tools"
    android:layout_width="match_parent"
    android:layout_height="match_parent"
    android:background="@color/background"
    android:padding="10dp">

    <ListView
        android:id="@+id/listView"
        android:layout_width="match_parent"
        android:layout_height="wrap_content"
        android:background="@color/background"/>

</RelativeLayout>
3) Create Java class for tab1 and tab2
For tab1.xml and tab2.xml layout resource files, you need to create two java classes that will contain these resources as fragments.
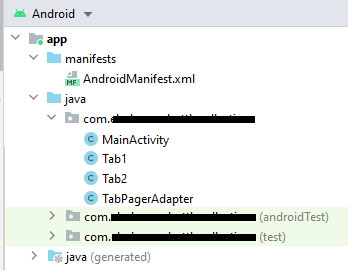
Add some code in Tab1.java and Tab2.java classes
Tab1.java
package com.geetaregmi.tabactivity;

import android.os.Bundle;
import android.view.LayoutInflater;
import android.view.View;
import android.view.ViewGroup;
import android.widget.ListView;

import androidx.fragment.app.Fragment;

import java.util.ArrayList;


public class Tab1 extends Fragment {
    ListView list;
    View view;

    public Tab1() {
    }

    //Overridden method onCreateView
    @Override
    public View onCreateView(LayoutInflater inflater, ViewGroup container, Bundle savedInstanceState) {
        view = inflater.inflate(R.layout.tab1, container, false);

        list = view.findViewById(R.id.listView);
        ArrayList<String> title= new ArrayList<>();

        title.add("Item 1");
        title.add("Item 2");
        title.add("Item 3");
        title.add("Item 4");
        title.add("Item 5");
        title.add("Item 6");
        title.add("Item 7");
        title.add("Item 8");
        title.add("Item 9");
        title.add("Item 10");
        title.add("Item 11");
        title.add("Item 12");
        title.add("Item 13");
        title.add("Item 14");
        title.add("Item 15");
        title.add("Item 16");
        title.add("Item 17");
        title.add("Item 18");
        title.add("Item 19");
        title.add("Item 20");

        CustomAdapter adapter = new CustomAdapter(title,getActivity());
        list.setAdapter(adapter);

        return view;
    }
}
Tab2.java
package com.geetaregmi.tabactivity;

import android.os.Bundle;
import android.view.LayoutInflater;
import android.view.View;
import android.view.ViewGroup;
import android.widget.ListView;

import androidx.fragment.app.Fragment;

import java.util.ArrayList;


public class Tab2 extends Fragment {
    ListView list;
    View view;

    public Tab2() {
    }

    //Overridden method onCreateView
    @Override
    public View onCreateView(LayoutInflater inflater, ViewGroup container, Bundle savedInstanceState) {
        view = inflater.inflate(R.layout.tab2, container, false);

        list = view.findViewById(R.id.listView);
        ArrayList<String> title= new ArrayList<>();

        title.add("Item 1");
        title.add("Item 2");
        title.add("Item 3");
        title.add("Item 4");
        title.add("Item 5");
        title.add("Item 6");
        title.add("Item 7");
        title.add("Item 8");
        title.add("Item 9");
        title.add("Item 10");
        title.add("Item 11");
        title.add("Item 12");
        title.add("Item 13");
        title.add("Item 14");
        title.add("Item 15");
        title.add("Item 16");
        title.add("Item 17");
        title.add("Item 18");
        title.add("Item 19");
        title.add("Item 20");

        CustomAdapter adapter = new CustomAdapter(title,getActivity());
        list.setAdapter(adapter);

        return view;
    }
}
4) Create a View Pager Adapter in Java class
Now create a View Pager Adapter java class and name it as ViewPagerAdapter.java and Paste the below code inside it.
ViewPagerAdapter.java
package com.geetaregmi.tabactivity;

import androidx.annotation.NonNull;
import androidx.fragment.app.Fragment;
import androidx.fragment.app.FragmentManager;
import androidx.fragment.app.FragmentPagerAdapter;
import androidx.fragment.app.FragmentStatePagerAdapter;

public class ViewPagerAdapter extends FragmentPagerAdapter {

    //integer to count number of tabs
    int tabCount;


    //Constructor to the class
    public ViewPagerAdapter(FragmentManager fm) {
        super(fm);
    }


    //Overriding method getItem
    @NonNull
    @Override
    public Fragment getItem(int position) {
        //Returning the current tabs
        switch (position) {
            case 0:
                return new Tab1();
            case 1:
                return new Tab2();
            default:
                return null;
        }
    }

    //Overriden method getCount to get the number of tabs
    @Override
    public int getCount() {
        return 2;
    }

    @Override
    public CharSequence getPageTitle(int position) {
        String title = null;
        if (position == 0)
        {
            title = "list";
        }
        else if (position == 1)
        {
            title = "Collect";
        }
        return title;
    }
}
5) Creating CustomAdapter
Now, you need to create your custom adapter and name as CustomAdapter.java
package com.geetaregmi.tabactivity;

import android.content.Context;
import android.view.LayoutInflater;
import android.view.View;
import android.view.ViewGroup;
import android.widget.ArrayAdapter;
import android.widget.TextView;

import androidx.annotation.Nullable;

import java.util.ArrayList;

public class CustomAdapter extends ArrayAdapter {
    private final ArrayList headerItem;
    Context context;

    // View lookup cache
    private static class ViewHolder {
        TextView txtName;

    }

    public CustomAdapter(ArrayList data, Context context) {
        super(context, R.layout.header_item, data);
        this.headerItem = data;
        this.context = context;

    }

    @Nullable
    @Override
    public String getItem(int position) {
        return (String) headerItem.get(position);
    }

    @Override
    public View getView(int position, View convertView, ViewGroup parent) {

        ViewHolder viewHolder;

        if (convertView == null) {
            viewHolder = new ViewHolder();
            LayoutInflater inflater = LayoutInflater.from(getContext());
            convertView = inflater.inflate(R.layout.header_item, parent, false);
            viewHolder.txtName = (TextView) convertView.findViewById(R.id.title);
            convertView.setTag(viewHolder);
        } else {
            viewHolder = (ViewHolder) convertView.getTag();
        }

        viewHolder.txtName.setText(getItem(position));
        return convertView;
    }
}
6) Remove Actionbar
Here, you have to remove your Actionbar and use the toolbar instead. To do this add the below code to your styles.xml file located under the values folder.
<resources>
<!-- changing it to no actionbar -->
    <style name="AppTheme" parent="Theme.AppCompat.Light.NoActionBar">
        <!-- Customize your theme here. -->
        <item name="colorPrimary">@color/colorPrimary</item>
        <item name="colorPrimaryDark">@color/colorPrimaryDark</item>
        <item name="colorAccent">@color/colorAccent</item>
    </style>


</resources>
7) Design your TabLayout and ViewPager in activity_main.xml
<?xml version="1.0" encoding="utf-8"?>
<androidx.coordinatorlayout.widget.CoordinatorLayout
    xmlns:android="http://schemas.android.com/apk/res/android"
    xmlns:app="http://schemas.android.com/apk/res-auto"
    xmlns:tools="http://schemas.android.com/tools"
    android:layout_width="match_parent"
    android:layout_height="match_parent"
    tools:context=".MainActivity">

    <com.google.android.material.appbar.AppBarLayout
        android:layout_width="match_parent"
        android:layout_height="wrap_content">

        <com.google.android.material.tabs.TabLayout
            android:id="@+id/tabLayout"
            android:layout_width="match_parent"
            android:layout_height="wrap_content"
            android:background="@color/blue"
            app:tabSelectedTextColor="@color/white"
            app:tabTextColor="@color/white"
            tools:ignore="SpeakableTextPresentCheck" />
    </com.google.android.material.appbar.AppBarLayout>

    <androidx.viewpager.widget.ViewPager
        android:id="@+id/viewPager"
        android:layout_width="match_parent"
        android:layout_height="match_parent"
        app:layout_behavior="@string/appbar_scrolling_view_behavior"
        tools:ignore="SpeakableTextPresentCheck" />

</androidx.coordinatorlayout.widget.CoordinatorLayout>
8) MainActivity.java
Now, you have to add some code in your main activity to function your tab Layout.
package com.geetaregmi.tabactivity;

import android.os.Bundle;

import com.google.android.material.tabs.TabLayout;

import androidx.appcompat.widget.Toolbar;
import androidx.viewpager.widget.ViewPager;
import androidx.appcompat.app.AppCompatActivity;

public class MainActivity extends AppCompatActivity {

    //Declare your TabLayout and ViewPager
    private TabLayout tabLayout;
    private ViewPager viewPager;

    @Override
    protected void onCreate(Bundle savedInstanceState) {
        super.onCreate(savedInstanceState);
        setContentView(R.layout.activity_main);

       //Replace action bar into toolbar
        Toolbar mToolbar = findViewById(R.id.toolbar);
        setSupportActionBar(mToolbar); // Setting replace toolbar as the ActionBar

        //Initializing the tabLayout and viewLayout
        tabLayout = findViewById(R.id.tabLayout);
        viewPager = findViewById(R.id.viewPager);

        //Creating our pager adapter
        ViewPagerAdapter adapter = new ViewPagerAdapter(getSupportFragmentManager());

        //Adding adapter to pager
        viewPager.setAdapter(adapter);

        //setUpWithViewPager is used to join tabLayout and viewPager
        tabLayout.setupWithViewPager(viewPager);

        //Adding onTabSelectedListener to swipe views
        tabLayout.addOnTabSelectedListener(new TabLayout.OnTabSelectedListener() {
           @Override
           public void onTabSelected(TabLayout.Tab tab) {
               viewPager.setCurrentItem(tab.getPosition());
           }

           @Override
           public void onTabUnselected(TabLayout.Tab tab) {

           }

           @Override
           public void onTabReselected(TabLayout.Tab tab) {

           }

        });
    }
}
9) Create header_item.xml to display listitem titles
<?xml version="1.0" encoding="utf-8"?>
<LinearLayout xmlns:android="http://schemas.android.com/apk/res/android"
    android:layout_width="match_parent"
    android:layout_height="match_parent">

    <TextView
        android:id="@+id/title"
        android:layout_width="0dp"
        android:layout_height="40dp"
        android:layout_weight="1"
        android:textSize="16dp"
        android:gravity="center_vertical"
        android:textColor="@color/black"
        android:text="TextView" />
</LinearLayout>
10) Create main_toolbar.xml
<?xml version="1.0" encoding="utf-8"?>
<androidx.coordinatorlayout.widget.CoordinatorLayout xmlns:android="http://schemas.android.com/apk/res/android"
    android:layout_width="match_parent"
    android:layout_height="match_parent"
    xmlns:app="http://schemas.android.com/apk/res-auto">

    <androidx.appcompat.widget.Toolbar
        android:id="@+id/toolbar"
        android:layout_width="match_parent"
        android:layout_height="wrap_content"
        android:background="@color/blue"
        android:elevation="4dp"
        android:theme="@style/ThemeOverlay.AppCompat.Dark.ActionBar"
        app:popupTheme="@style/ThemeOverlay.AppCompat.Light"
        app:title="Tab layout"
        app:navigationIcon="@drawable/ic_baseline_menu_24"/>

</androidx.coordinatorlayout.widget.CoordinatorLayout>
11) Create colors.xml
<?xml version="1.0" encoding="utf-8"?>
<resources>
    <color name="colorPrimary">#6200EE</color>
    <color name="colorPrimaryDark">#3700B3</color>
    <color name="colorAccent">#03DAC5</color>
    <color name="background">#CED6E0</color>
    <color name="blue">#4B6584</color>
    <color name="purple_200">#FFBB86FC</color>
    <color name="purple_500">#FF6200EE</color>
    <color name="purple_700">#FF3700B3</color>
    <color name="teal_200">#FF03DAC5</color>
    <color name="teal_700">#FF018786</color>
    <color name="black">#FF000000</color>
    <color name="white">#FFFFFFFF</color>
    <color name="orange">#FFA500</color>
</resources>
12) strings.xml
<resources>
    <string name="app_name">TabActivity</string>
    <string name="tab_text_1">Tab 1</string>
    <string name="tab_text_2">Tab 2</string>
</resources>
Now, run your application you will get exactly the same output as shown below screenshot:
You may interest on the following topics:
- How to implement searchView widget in android Studio through Recycleview?
- How to create an expandable listview in Fragments in Android Studio?
- How to create an expandable list view in Android Studio?
- How do I check Intel Virtualization Technology is enabled or not in Windows 10?
- Plugin ‘Android WiFi ADB’ is compatible with IntelliJ IDEA only because it doesn’t define any explicit module dependencies
- Could not install Gradle Distribution from ‘https://services.gradle.org/distributions/gradle-6.5-all.zip’
- How to solve “INSTALL_PARSE_FAILED_NO_CERTIFICATES” error in Android Studio?
- Android Studio Run/Debug configuration error: Module not specified.
- How to search in multiple nodes in Firebase Database?
- How to get the sum of child nodes in Firebase database?
- How to display website in an android app using WebView component?
- Android Layout Using ViewPager and Fragments
- How do I install Android Studio in Windows 10?
- How to display ListView in Fragments using ViewPagers?
- How to create a custom AlertDialog in Android Studio?
- How do I change the name under apps that display in google play store?
- Where does my database store in Android Studio?
- How to add google places autocomplete in Android Edittext?
- How do I convert dp into px in the android studio?
- What are the android screen background sizes?
- What are the sizes of the Android icon located inside the mipmap?
- How do I remember my android app signing key?
- How do I create a Toolbar in Android Studio?
- How to get Android Spinner Dropdown?
- error: package R doesn’t exist in android studio project?
- Firebase Email and Password registration for Android App
- How do I change the company domain name in Android Studio after creating a project?
- How do I make an existing Android Studio Project copy?
- How do I migrate an Android Studio 3.2 existing project to Android X?
- Step by step to insert both banner and interstitial ads in android apps.
- Android TimePicker upon clicking on edittext in Android Studio?
- Migrating to AndroidX Errors:
- How to popup date picker when clicking on edittext in Android Studio?
- AndroidX: ExampleInstrumentedTest.java Class Source code
- How to add user registration data into the Firebase database?
- Cannot find Symbol: ApplicationTestCase
- How do I use Android vector images in Android apps?
- How to create a new Android Virtual Device (AVD) in Android Studio?
- On SDK version 23 and up, your app data will be automatically backed up and restored on app install.
- App is not indexable by Google Search; consider adding atleast one Activity with an Action-View intent-filter.
- How do I style my button in Android app?
- How do I create drawable folder in Android Studio?
- How do I create new classes in Android Studio?
- How to create new android project tutorial?
- How to upgrade Android Studio 2.2.3 to new versions or Android Studio 3.5.3?
- error: Package R does not exist after renamed package name?